


How to Create an Audio Voiceover
In this piece I cover my workflow and the tools I use to create my voiceovers

I began recording audio voiceovers shortly after starting my Substack publication. Mainly, I was doing it because I wanted to hone and practice for a more ambitous project—recording several books as audio books. I have finally gotten a good workflow down, and it no longer takes me all day to get a decent ten minute recording of one of my short pieces. I’ve learned a lot, and thought I’d share with you, so that you too feel confident in tackling your own voiceover projects.
The Tools I use:
DAW—Digital Audio Workstation—I use Logic Pro, which is a paid app made by Apple. I think it is terrific, but if your budget doesn’t permit that, there are a number of free apps available for both Mac and Windows. Audacity and Garageband are both excellent choices, and BandLab has something called Cakewalk.
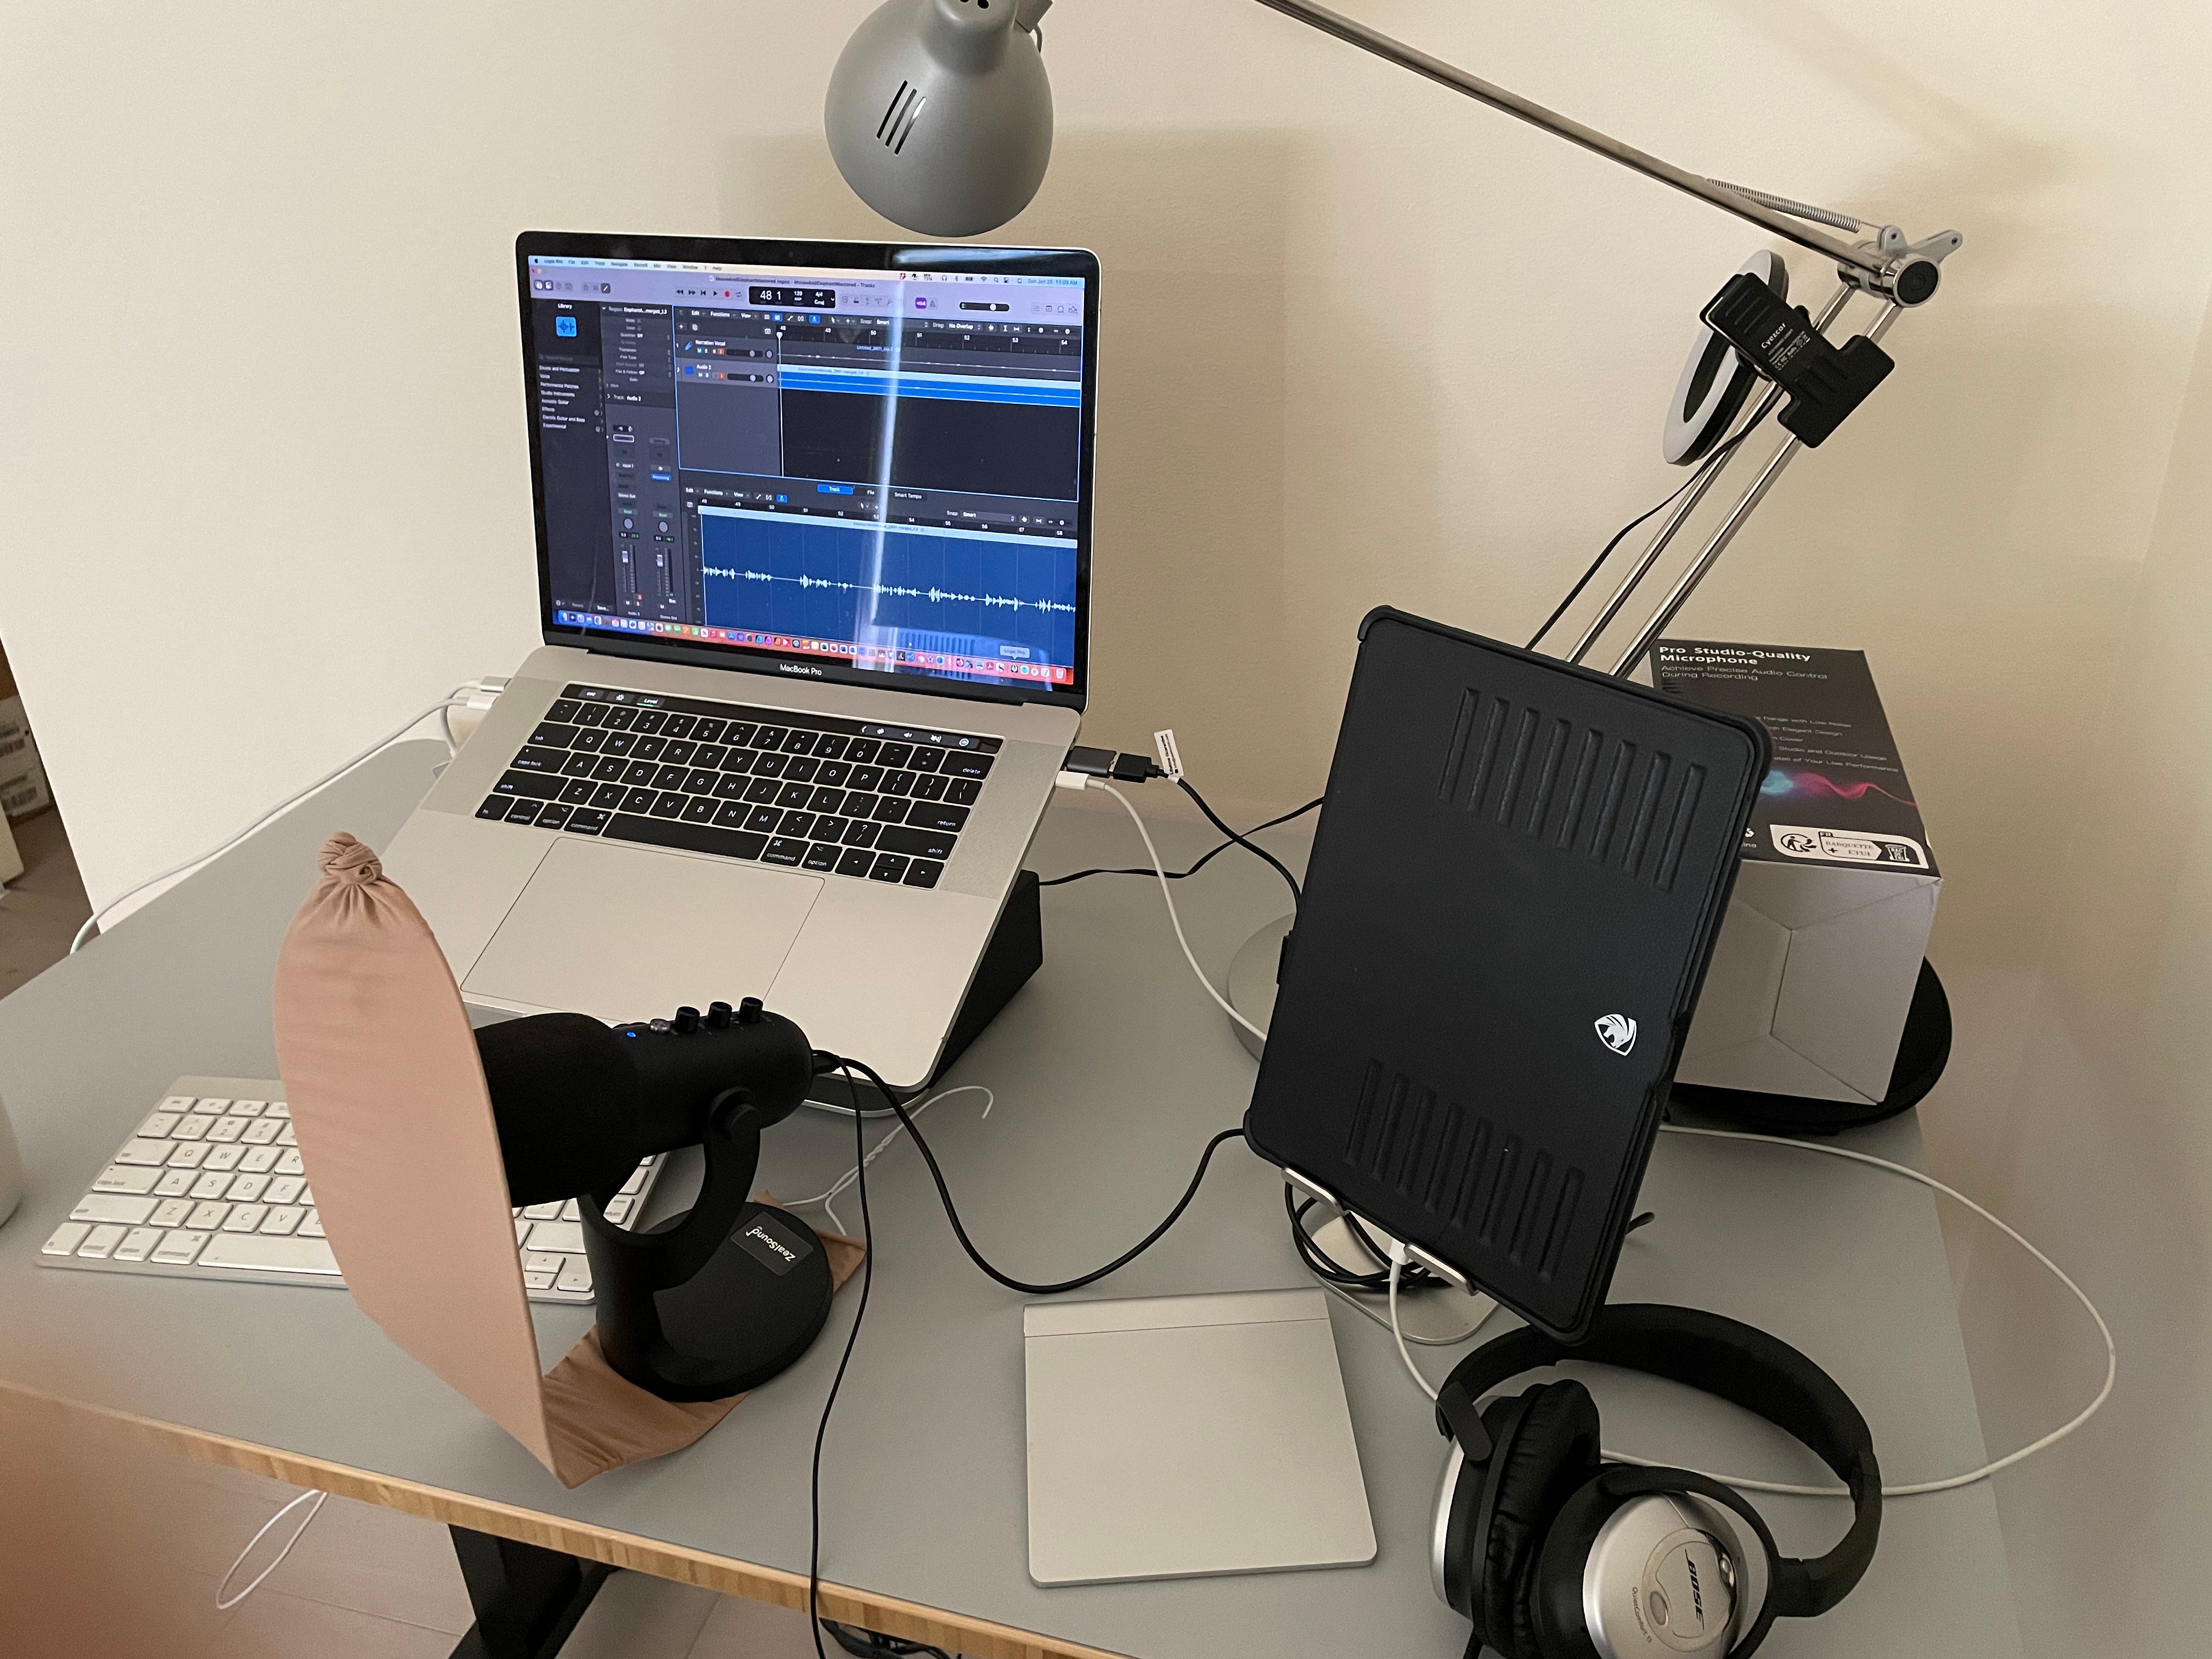
You don’t need a super expensive microphone to make good recordings, but it is helpful to use a microphone with a pop filter. You can just use your phone or your system Mic if you don’t have the money to spare. There is also the option of using the Mic in your phone headset, if you have one. Right now, my good mics and pop filters are packed up for a move so I found a $30 USB condenser mic on Amazon that does a reasonable job, and made my own pop filter with a hanger and some old tights. It is important to have consistent sound levels and cheaper mics seem to be little harder to control.
Headphones—use what you have, but you should use corded to reduce audio delay. I use over ear ones. If you want to be fancy you can buy headphones specifically for monitoring. I use those when recording music, but not for voiceover stuff.
Okay, next about workflow.
My Workflow
Set up your recording space somewhere quiet in your house that doesn’t have too much echo. Some people like recording in a closet. I don’t have the luxury of a studio set up at the moment, so I have my desk tucked in a corner. If you live in a noisy place, make sure your windows and drapes are pulled. You want to minimize the noise floor. You can also do this in your DAW usually using built in tools that will allow you to do it easily either while or after you have recorded. In Logic this is controlled by something called Noisegate, but it is called different things in different DAWs.
Make sure to position your writing so that you are speaking directly into your mic while you are reading it. If you are using a headset mic it will follow you. You generally want to remain pretty still though, because the mic can pick up your movements. If you need to swallow, cough, sniff or whatever, you don’t need to stop recording. Just leave space around your mouth noise so you can easily cut it out later. Don’t read too fast. Speak clearly. Experiment with your speed, and ask someone else to give their opinion.
I read off the same computer that I am using for my DAW, so I flip between apps, but you could use an iPad to read off and another device for recording. My eyes are not the greatest, so I also enlarge the text and make sure I have a lot of white space.
When I first started recording I got really flustered when I made a mistake. Don’t. I experimented with different ways to fix my mistakes, and this is what I learned that has made my life so much easier. Keep your recording running, pause, take a breath and repeat the line where your mistake occurred. It’s much harder to go back later. The other thing I learned is that leaving too much space between sentences is never a problem. Cutting out space or mistakes is easier than inserting them later, because replicating your exact sound setup or the tone in your voice is difficult.
Don’t worry if your sound levels are not high. You are better off having a quieter recording with lots of headroom for mastering than having one that is too high to begin with. The important thing is that your recording is all at roughly the same level. That brings me to the topic of mastering. Real sound engineers are amazing. I am not one, so I use automated mastering in my DAW. Before that, I used the free mastering offered on BandLab. It’s really amazing how good one’s voice can sound when you add the compression and other tweaks in the mastering stage.
To recap what I do:
Set up in a quiet place.
Set writing up so that you can easily read it while speaking into your mic.
Test recording setup to make sure sound levels are not too high.
Practice reading before hand to see if there are any gotchas.
Turn on the recording, read, pause, re-read if you make a mistake, pause, breathe, keep going.
Listen to recording, remove mistakes and close gaps by cutting and scooting (highly technical term!) audio tracks. Join sections together or “bounce.” Copy whole track or “bounce” it to MP3. Create a separate mastering file, keep the original track in its raw form, in case you don’t like whatever you do in the mastering stage.
That’s about it. As you get used to doing this, you will develop your own strategies for making the work go quickly.
I hope that this little piece has been helpful. If it has, please feel free to share it. I would love to hear your comments and suggestions as well.

That sounds awfully hard, I mean, the editing process afterwards. I really want to make voice overs, but I’m quite worried because of my accent and because I tend to speak in a very low voice.
Thanks for this. Pretty much what I have for setup except I go back and forth between Audacity and Audition. I don’t know how to use either very well. Just enough to get along. The only part you talk about that I didn’t know about is the auto mastering. After I looked that up, I think I do that manually in a very crude way. It seems I’ll need special plugins and some idea what I’m doing to get “auto” mastering in Audition. I’m going to look into Audacity next for that.
I have a relatively cheap mic from Amazon that works pretty well. So it doesn’t have to cost much if anything to get setup and record, like you said.